Told ya I'd be back really soon! ;) Anyways... here's another one of my recent projects!
 |
| Sorry for the blurriness! :S |
As I had mentioned in the video, I don't have the Tim Holtz Ticket Strip Die... or any other ticket die for that matter! So, I had to make my own tickets. There's plenty of videos out there that explain how to make your own ticket strips, so I didn't want to make another one... it didn't feel necessary to me...
However, I did take pictures of my process and I'll walk you through that here! :D
First, I gathered all the materials I'd need:
- Card stock strips measuring 1" wide x 10" long (this will give you five 2" long tickets)
- Some kind of hole or circle punch to make the notches in the strip
- A perforating tool (or even a score tool will work if you don't have a perforating tool!)
- Ruler
- Pencil and eraser
Next, I wanted to make everything straight. So, I used a ruler and my pencil to mark a straight line 3/8" across the length of the strip on both sides. I made it 3/8" because that's the diameter if the circle punch I'm using and the notches are really just half a circle. If you'd be using a 1/4" hole punch, you'd make your line 1/4" in on either side of the strip. Make sense?
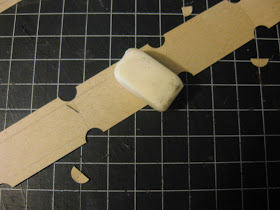
After making your pencil lines, use the ruler and your perforating tool (or score tool!) to perforate the strip every 2". This will give you your individual tickets in a strip!
Now, use your hole/ circle punch to punch out the notches of your tickets. It should be fairly easy to eyeball where to punch out the notches - just use your pencil lines and your perforation lines to line everything all up!
Finally, erase all your pencil lines and you've got some pretty darn perfect looking ticket strips! :D
Here's some close ups of my finished tickets:
This one has a bit of a French Flair I think...
I used an owl here because someone in my group wanted an owl ticket... but then I couldn't remember who it was for the life of me! :O
And here's the packaging I made for them:
Behind the labels is where I put my information for my group members and which group the tickets are for - just to make it a bit easier for our hostess to get the right tickets where they belong!
Anyways... I hope you all enjoyed! This post is a bit longer than I intended! Goes to show you can never say never! ;)
Thanks for stopping by!


